
Building low‑poly game‑ready 3D assets using AI models
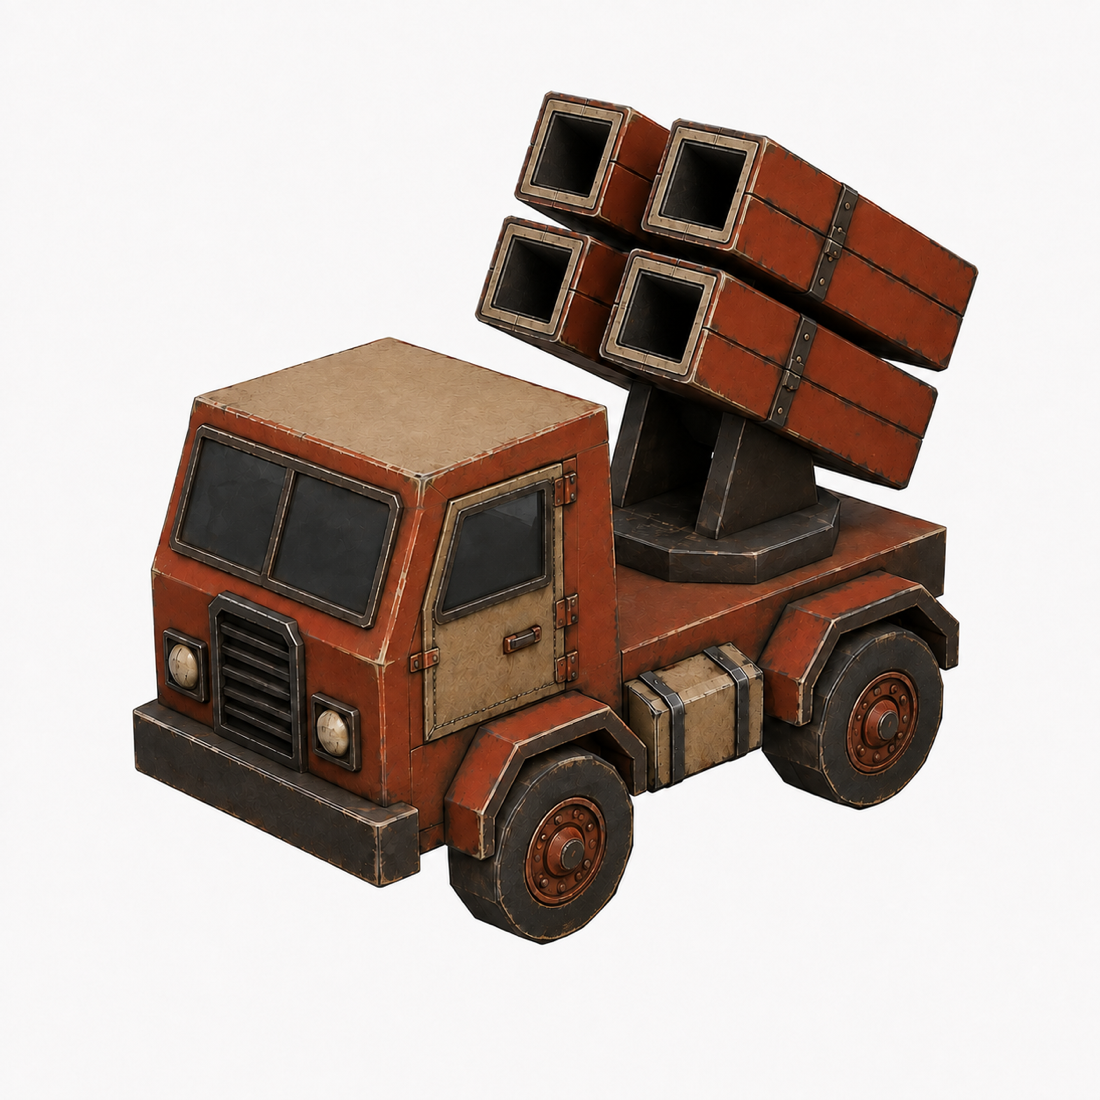
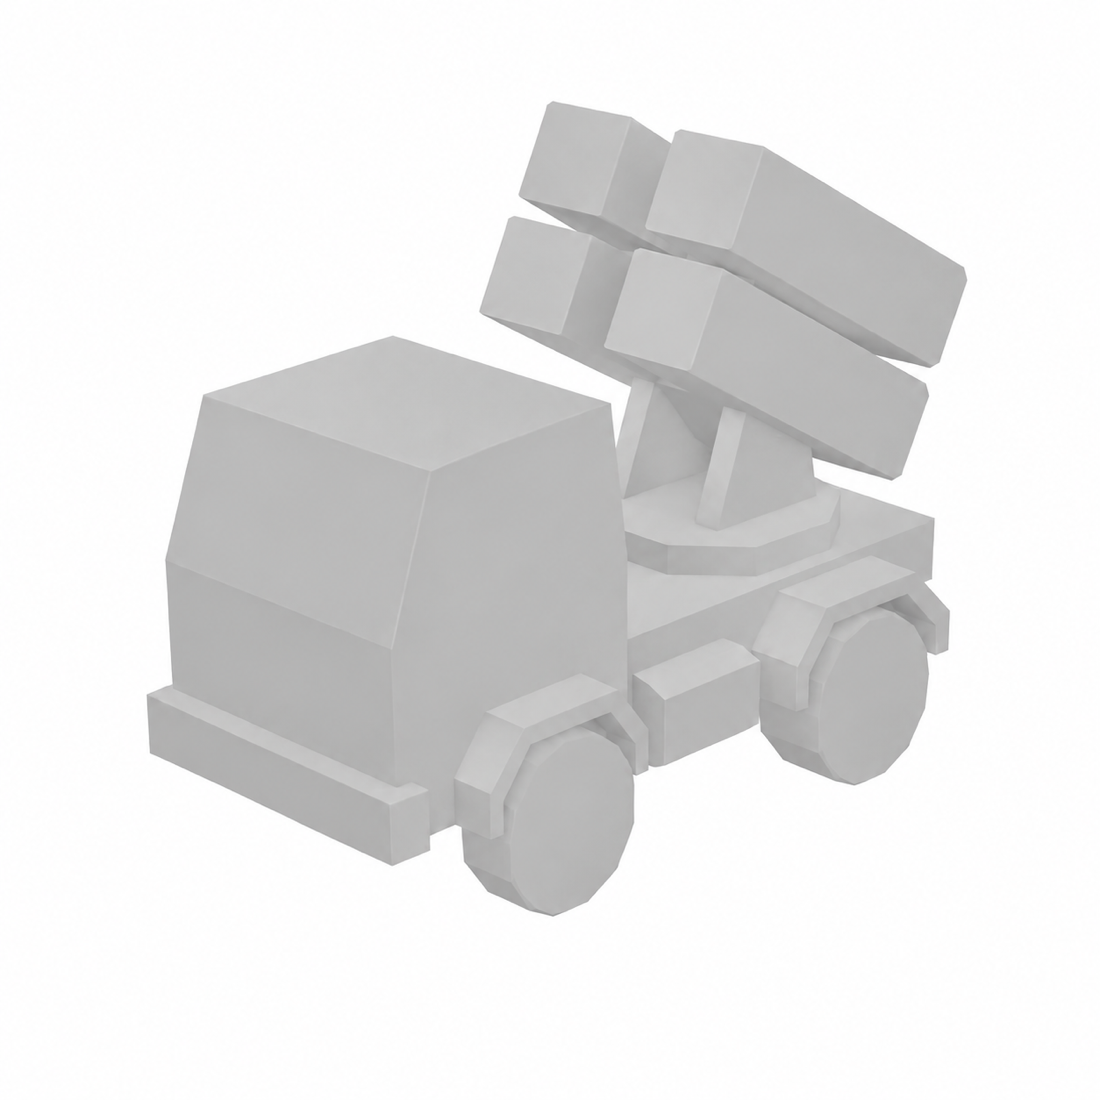
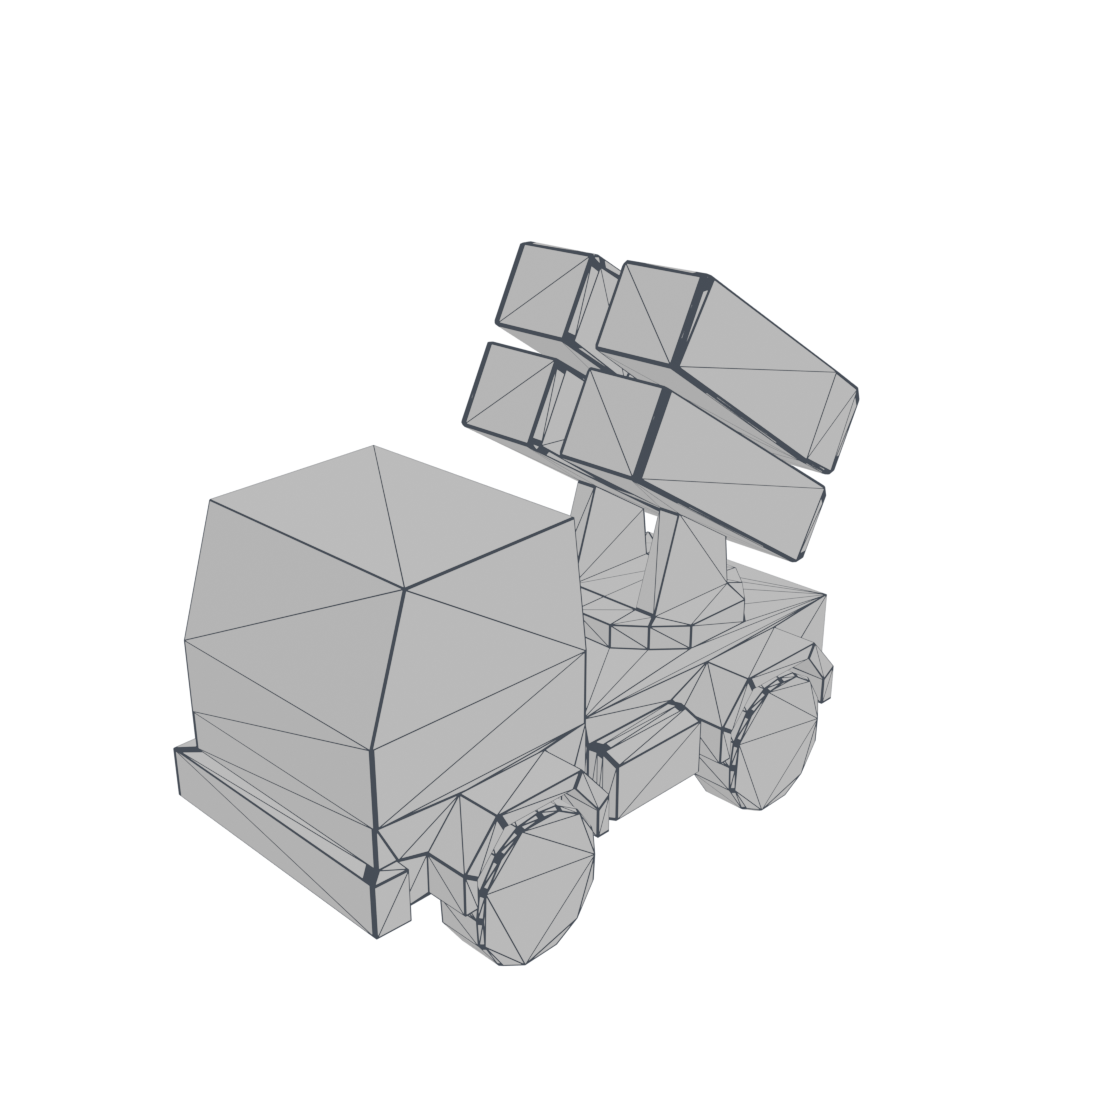
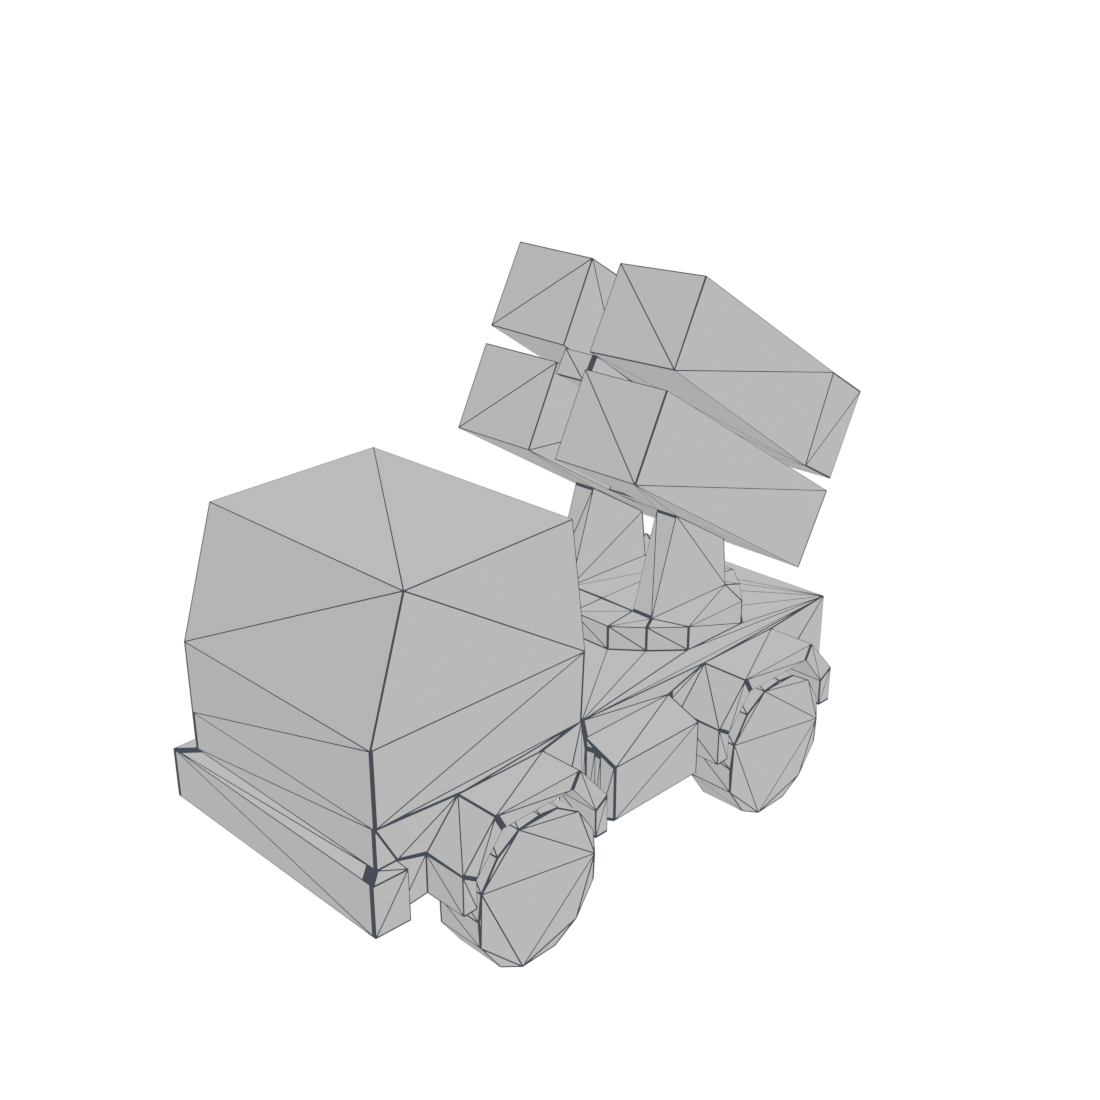
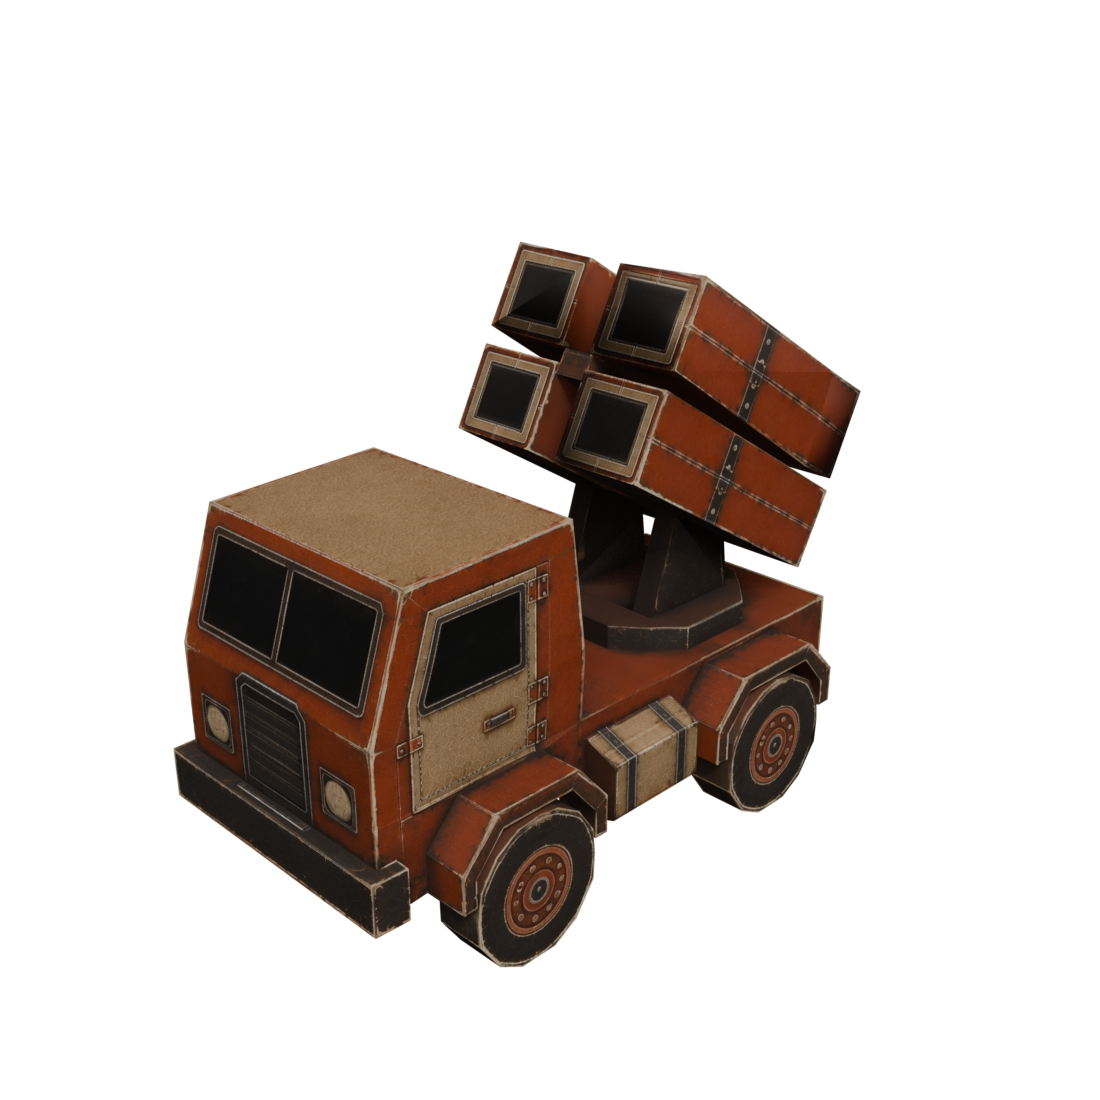
When I started building Warpact, I experimented with a number of image‑to‑3D AI models, including ones that claim to produce low-poly, game-ready assets. None of them actually did what they claimed. If you don't need the details exactly right, or you can live with a high poly count, you can get away with using these models as they are. But we were building a cross-platform RTS, so we needed low-poly assets to keep the game performant on constrained Android devices.
After quite a bit of experimentation and several subscriptions later, I found a pipeline that works well.
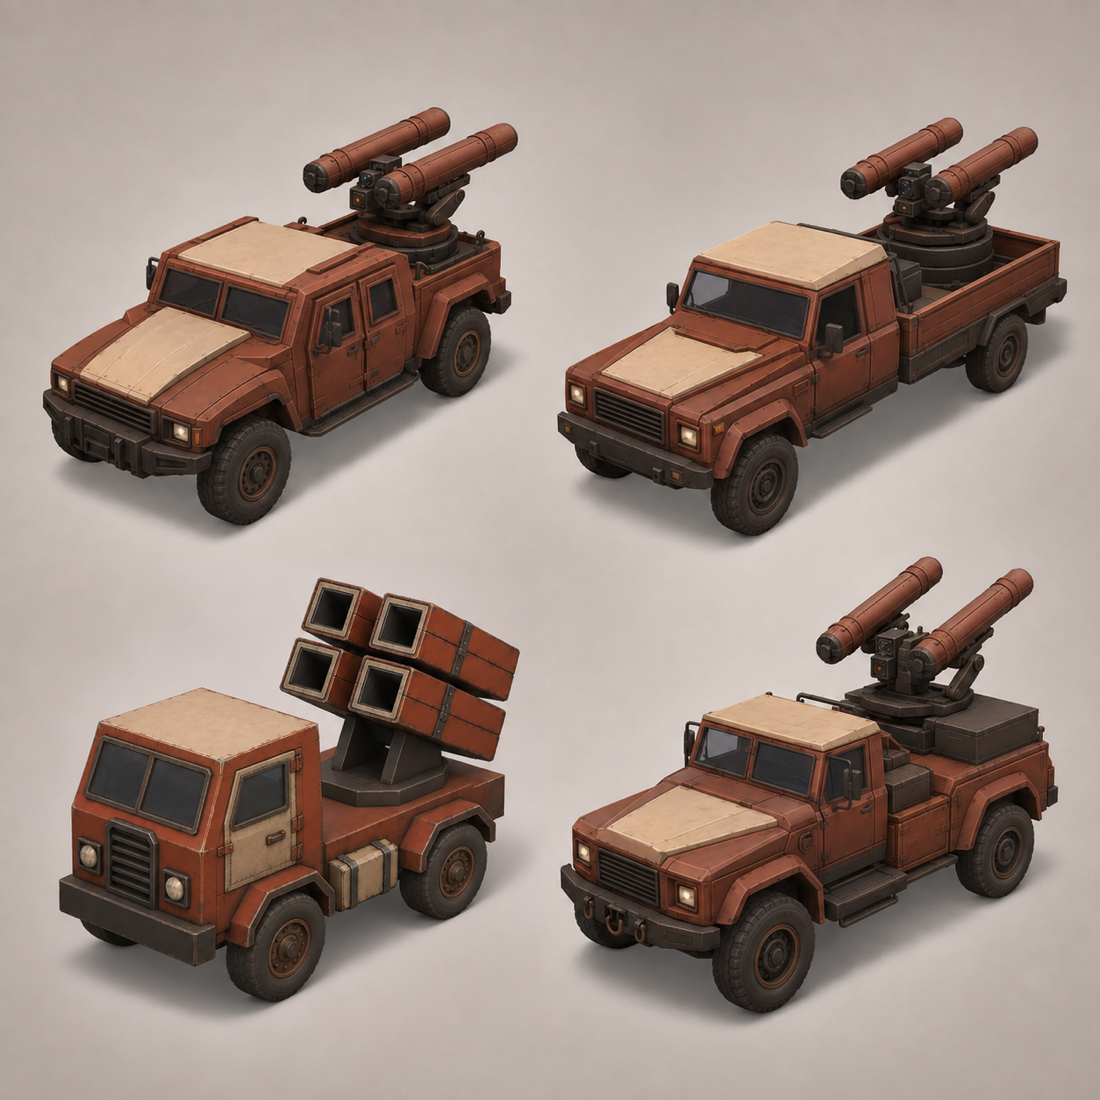
1. Concept — generate wide, pick one
I start with an image generation model and create several different design concepts based on my vision for the unit. I give it an intended poly budget, colors and a detailed description of the unit, and ask for four concepts per image. I keep iterating until I find a concept I like, then pick it and iterate on it a few more times until I'm happy. Asking for multiple concepts per image saves me time and tokens compared to generating one concept per image.
2. Strip it to a silhouette
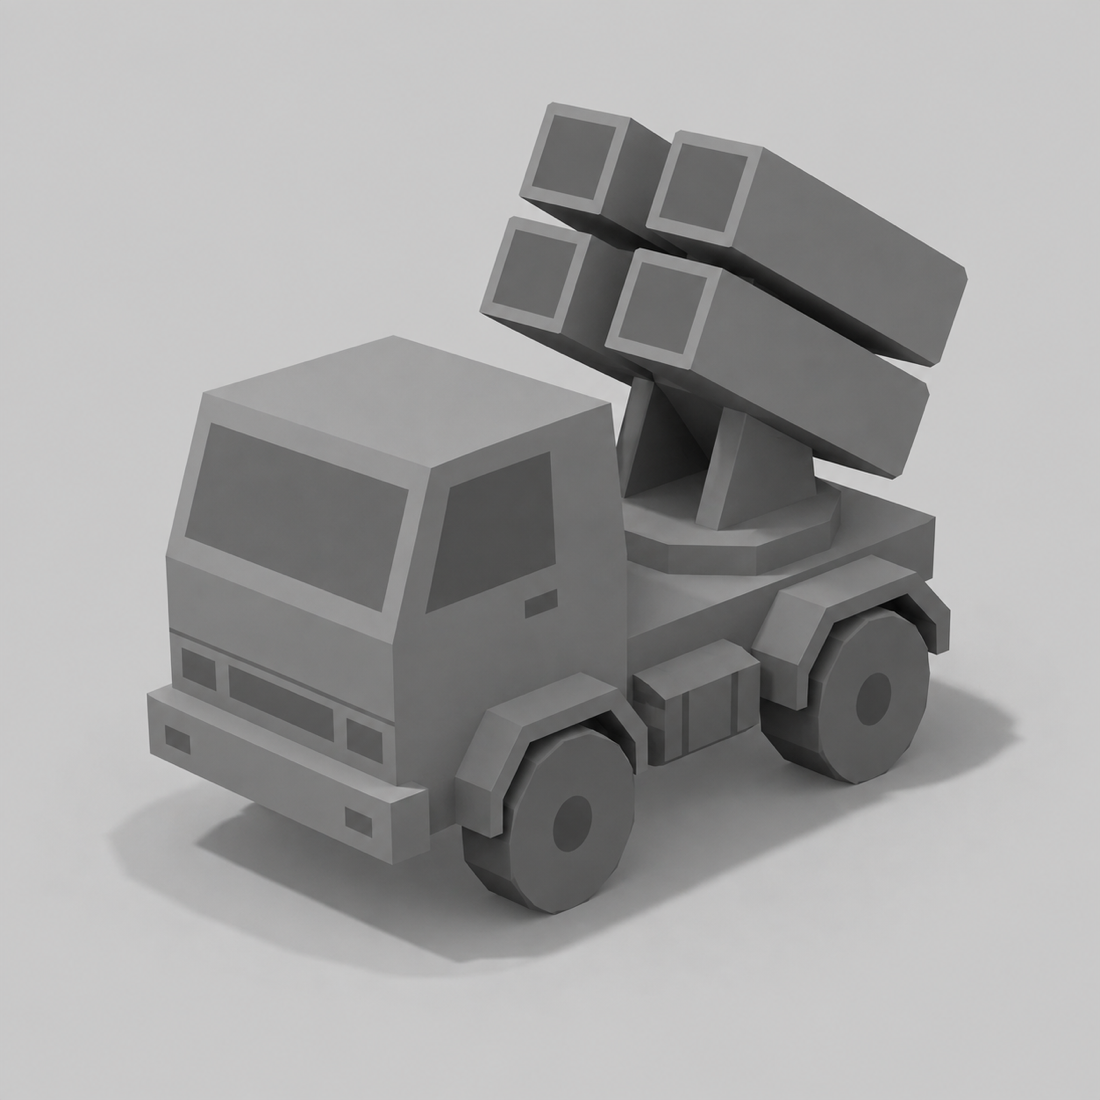
The final concept you generate will have a lot of detail: rivets, door handles, tire tread. If you pass that image directly to an image-to-3D generator, it will spend the poly budget on the wrong parts. For a low-poly asset you don't need every detail modelled in the mesh — much of it you can bake into the textures instead. So edit the concept down to a single-color, shadowless reference image. This typically takes me two to three image-edit passes. Some tips:
- Say "reduce geometric complexity", not "simplify". The first attempt just made the image look faceted. What worked was the explicit clause — "the essential change is REDUCING GEOMETRIC COMPLEXITY, not merely making the original look faceted" — plus a specific list of detail to remove: wheel rim indents, recessed windows, extruded grille, tank straps, pod banding. Keep only what affects the silhouette (bumper, fenders, cradle, turntable).
- Color and lighting. "Single color, no shadows" still left dark ambient-occlusion pockets between the pods and under the chassis — which a 3D generator will happily model as cavities. A final lighting-only pass ("keep all geometry, camera, background unchanged; remove shadow pockets; disable AO") cleaned them up.
3. Image-to-3D with smart topology
Take the silhouette to Hunyuan 3D's low-poly generator — 3d.hunyuanglobal.com/lowpoly — and turn smart topology on. That is the setting that gives you a clean quad mesh instead of a dense shell, and it is where the stripped silhouette pays off: there is no surface detail left for the generator to spend faces on. My input came back as 1,443 faces, mostly quads — 2,552 triangles — reading as boxes, wedges and ten-sided wheels rather than a triangle soup. Download it and discard the PBR textures it ships with; all you want from this step is the geometry, which gets textured properly in step 5.
I also tried having an agent hand-build this mesh from primitives against the same silhouette. Sometimes it works well, sometimes it doesn't — do what works for the particular shape.
4. Cut what the camera never sees
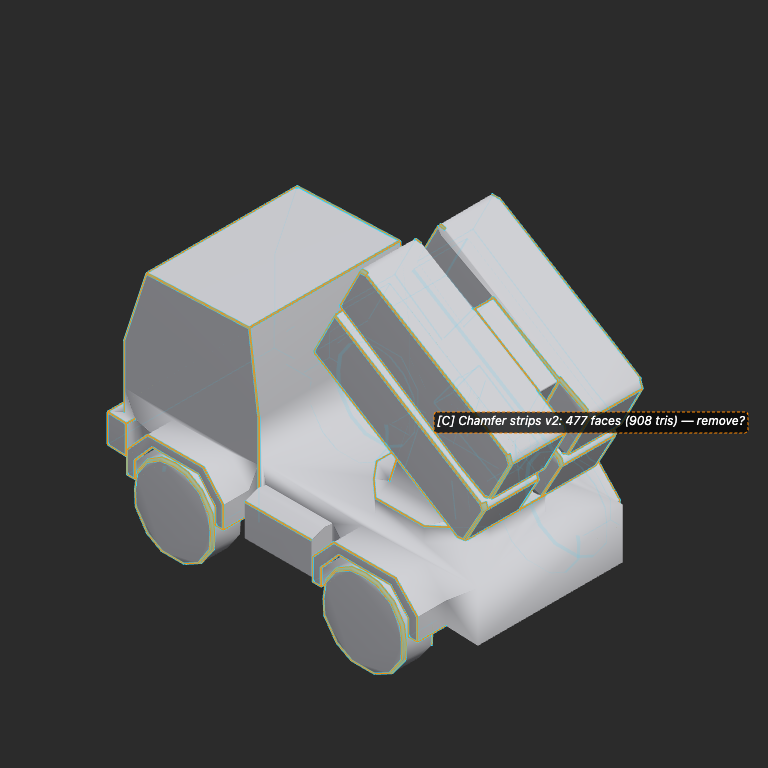
Once I have the mesh from Hunyuan, I ask an agent to clean it up in Blender, doing a few passes to cut unnecessary mesh where it isn't needed. For instance, the edges had chamfers I didn't need, as well as geometry on the bottom of the unit that would never be visible in game. For this step I used an internal tool I vibe-coded that lets me manipulate the mesh easily and annotate it to communicate my feedback to agents precisely. By the end of this step the triangle count had dropped by about 50%, hitting my target face count.
- Delete hidden faces. An RTS camera looks down; the underside, wheel inner walls and occluded pockets are not required. The agent can detect many of these, but I still had to hand-select plenty of areas to remove.
- Let the AI find the bevels, but approve before it cuts. Nearly half the faces — 477, costing 908 triangles — were chamfer strips a few millimeters wide: invisible at game zoom, and pure performance cost. The agent detected these surfaces and highlighted them for my approval. Once approved, it deleted and welded them cleanly.
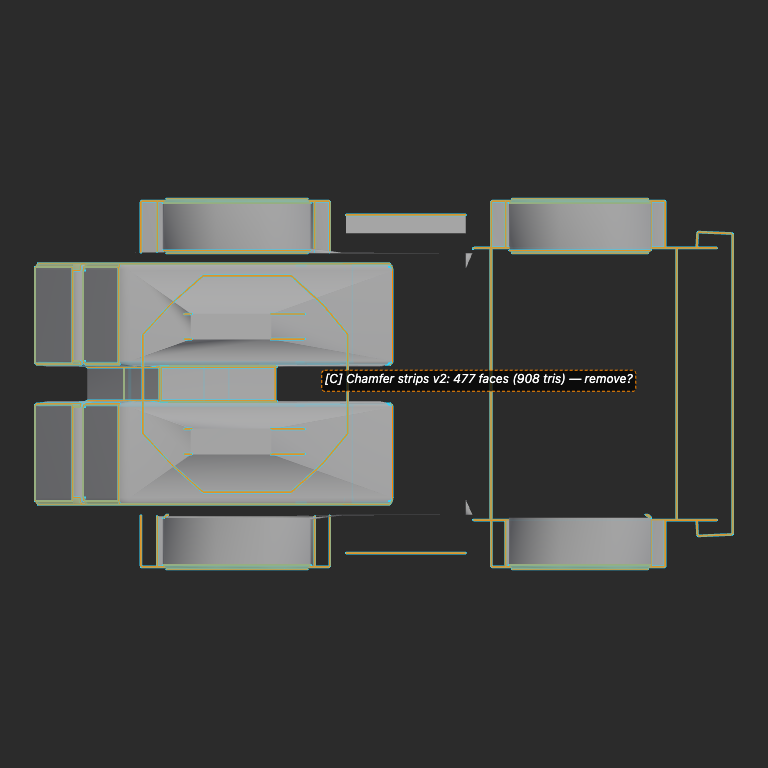
| Stage | Triangles |
|---|---|
| Raw smart-topology mesh | 2,552 |
| Hidden faces deleted (211 faces, by hand) | 2,222 |
| Chamfer strips collapsed to sharp edges | 1,114 |
| Sliver cleanup + pod bracket — final | 791 |
5. One multi-view texture pass
Now that I had a clean mesh, I set the model up to be textured. I've had the best results here with Meshy's tools. Meshy's retexture tool accepts up to four reference views and keeps your UVs and geometry untouched. You can texture from a single image, but I find image models more precise and controllable, so I tend to have one generate multi-view images from the single final concept image, and then use those with Meshy's texture tool.
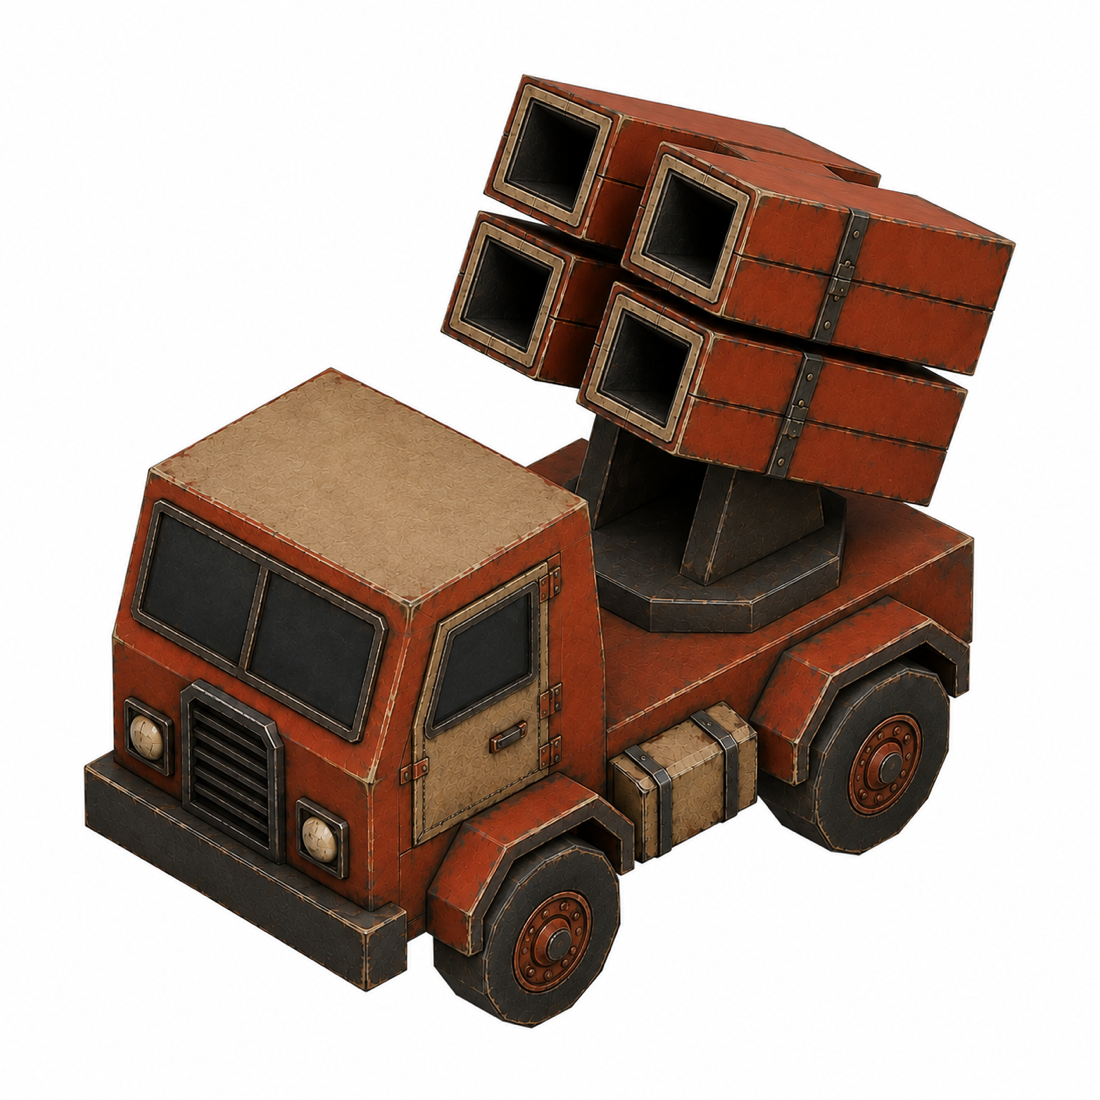
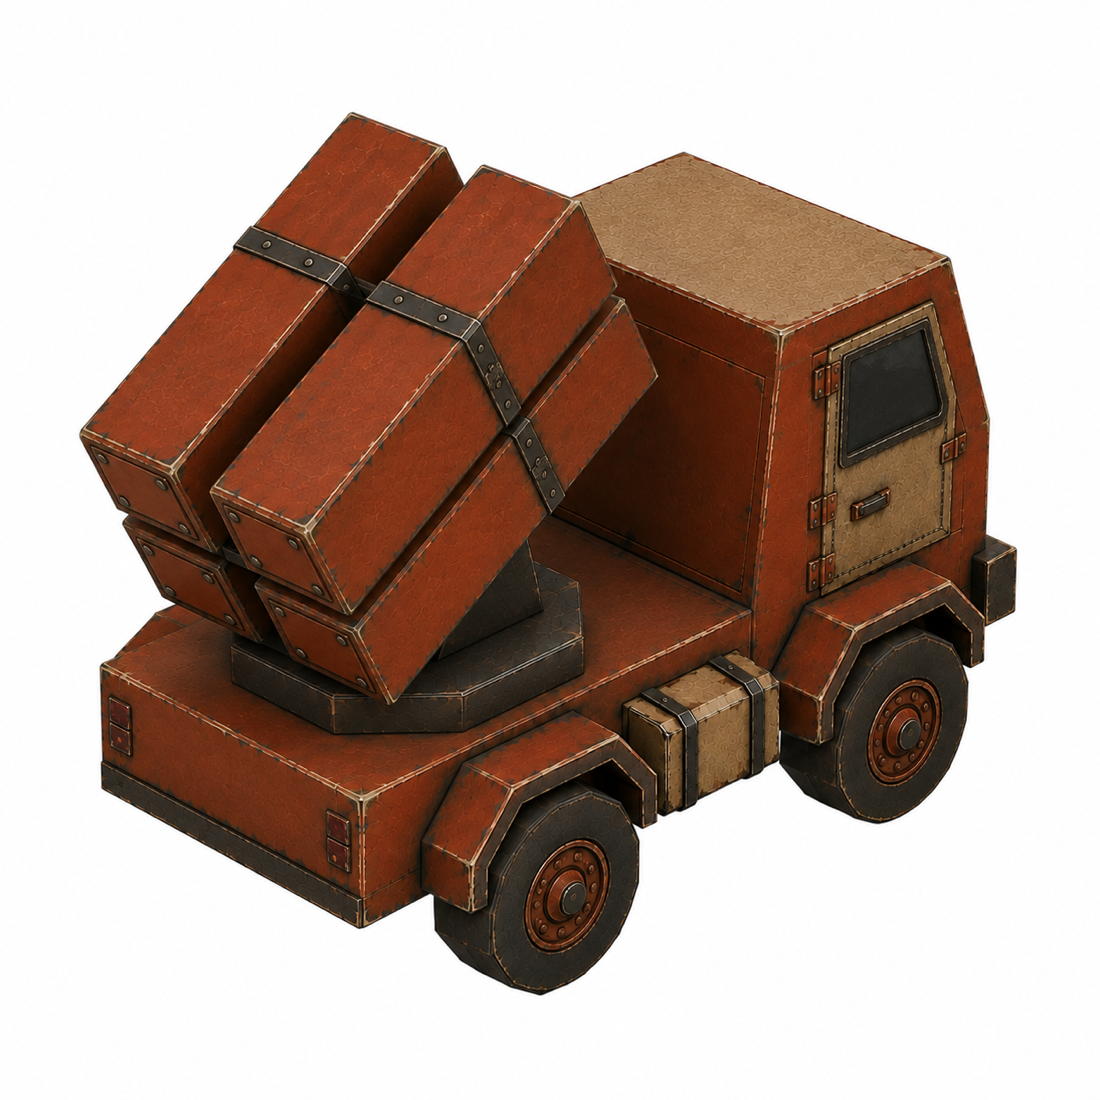
Then I upload the mesh to Meshy and texture it with their texture tool and the multi-view images. The texture comes back on your unchanged 791-triangle mesh. Meshy also allows free retries on a texture, so if you don't get the right result you can retry up to 12 times on a paid plan. I also set the textures to 8K — the highest resolution option — so that all the detail gets included.
Finally, I download the textured model and have an AI agent optimize it (downscaling the textures and so on) for in-game use. The downloaded model is fairly large (~50 MB) because of the 8K textures, so the agent downscales and optimizes it for the game.
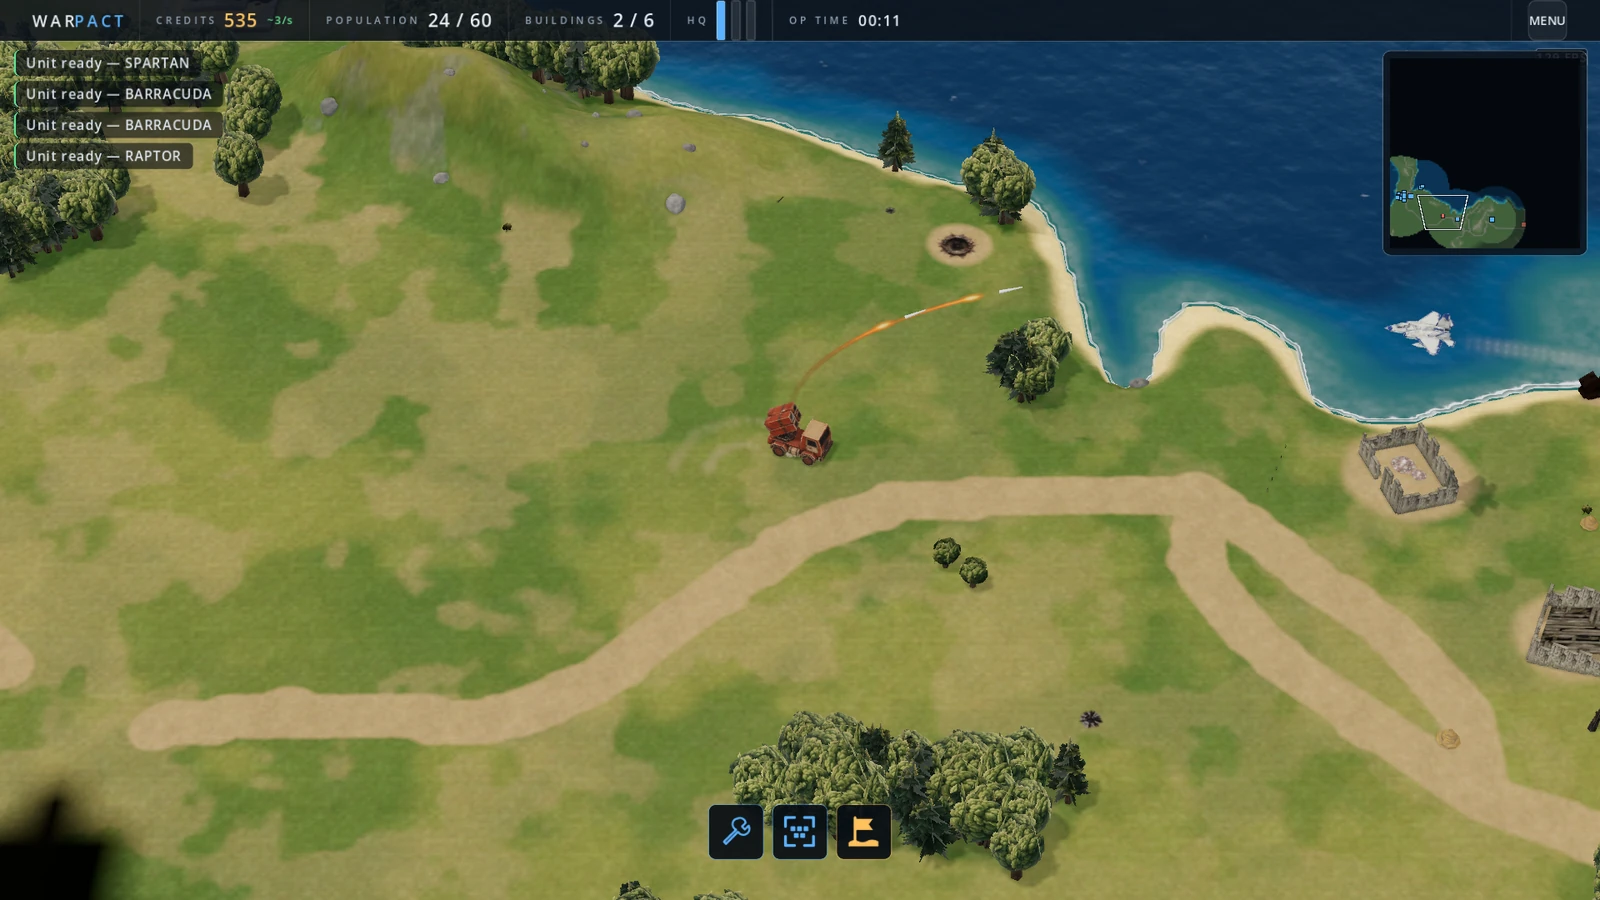
The tools I use in the pipeline: Codex CLI + built-in image generation (concepts, silhouette, texture refs, model optimization & cleanup) · Hunyuan 3D smart topology (mesh) · Blender + a custom AI editing UI (for cleanup) · Meshy multi-view retexture (for texture).